


Perhaps you have been searching for the perfect antique blue mason jars and just can’t find them, maybe you are looking to perfectly match centerpieces to your color scheme, or you might be looking to create an awesome look on a budget. If any of those options is you then you really want to read this fantastic How To from one of our FABULOUS DIY brides Alecia! – JoAnna
Hey there! I’m Alecia (one of Kate’s former brides). I was a definitely on a budget for my wedding, but like most brides, I had expensive taste. I adored the look of antique blue mason jars for my centerpieces, but couldn’t see myself paying $20-$40 for each jar. Multiply that number by how many I needed and BOOM – budget blown! Needless to say, I had to get creative.
While shopping in Safeway of all places, I saw an aisle end cap with cases of Ball mason jars. I loaded up my cart and tried to find a way to make these plain, clear jars into the gorgeous blue ones I just had to have. Funny how we brides just have to have these things, huh?
While obsessively searching online, I came across a great tutorial for DIY blue mason jars. All I needed was a fan brush, an old tupperware container I didn’t mind parting with, some dye, paint thinner, and an oven. Sounded easy enough! So, here’s some imagery of what you need:

Image via Amazon
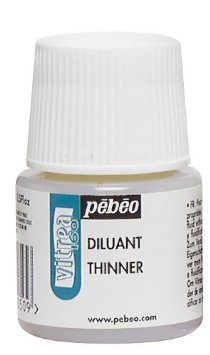
Image via Amazon

Image via Amazon
I found my dye and paint thinner at Michael’s, as well as the fan brush. You can also search online or use the links above. This whole project totaled around $30…and I got 12 jars out of it!
Now for the steps:
1. Prepare your paint. I took about a teaspoon of the Vitrea 160 (turquoise color) and mixed it with Vitrea 160 paint thinner. I would slowly add the paint thinner and stir it until I got the right color and consistency. It think I used roughly about a tablespoon of paint thinner.
2. Place the jar your going to paint top down into that Tupperware container and begin to paint it vertically with the fan brush. Unfortunately, no matter how good of a painter you are there will be some streaks, but after the vase is filled with water and pretty flowers you can barely see them.
3. After you’re done painting that first jar, place it on some newspaper to dry and paint your remaining jars.
4. The tutorial I read online said to let the jars dry overnight. I started this project in the morning and decided to do the next step later that evening. I’m impatient, what can I say?! If you’d like, feel free to let the jars sit overnight and start this next step the following day, or be a rebel like me and do it all in one day. Completely up to you! Ok, so here’s the weird part. Preheat your oven to 325 degrees. While the oven is warming up, place your painted jars on a baking sheet (I did six at a time). Once the oven is ready, bake…yes I said bake your jars for about 30 minutes. I found that so odd, but hey it worked!
5. Then let your jars cool and voila! Inexpensive, beautiful “antique” blue mason jars for your wedding! I love mine and continue to use them around the house 8 months later.
Here’s a pic from my wedding.

Image courtesy of Wiley Photo
I dolled up the jars with some burlap, raffia and mini pine cones. My wedding was in Tahoe – so I wanted a little bit of a rustic feel.
I hope this helps you save some cash while still make your wedding dreams come true. Enjoy and best wishes!


I love Kate’s crafty former brides sharing their budget-saving DIY! Thank you!
WOW! They look beautiful! 🙂 I’m also looking for the same kind of idea for my wedding next year in june. I’m so glad i found your website on how i can do this myself. Thank you so much! Your wedding photo is stunning!